Suppose we need to round up the following data (in minutes) in a SharePoint Column to later hour: -
Time
10
30
60
90
140
Here's how one can go about it.Add a new calculated field and add the following Excel function - ROUNDUP(value, number of digits). Our formula would be - ROUNDUP([Time]/60,0). This would round up the minutes to nearest later hour. Hence result would be: -
Time
10 1
30 1
60 1
90 2
140 3
Tuesday, March 9, 2010
Rounding up minutes to nearest later hour
.
Tuesday, March 9, 2010
1 comments


Monday, February 22, 2010
How to create and deploy a basic Site Definition
.
Monday, February 22, 2010
0
comments
A Site Definition provides the underlying structure of a site. It defines the site navigation, available features, document and list templates, initial lists and libraries, webparts available to a site when first created. Site Definitions provide a template for creating sites and can be re-used. Any change to the site definition is reflected across all the sites that are already created and those that shall be created in the future.
Site Definitions differ from site templates that are created by saving a site (non-publishing) as a site template using site settings menu options. Sites created using Site Definitions are ghosted or uncustomized while those created Site templates are un-ghosted or customized. Hence changes to site templates are not reflected in the site already created using them.
Let's have a look at the structural elements of a site definition.
Site definitions are located under 12\Template\SiteTemplates\ folder. It MAY contain following files: -
- ONET.XML - located under Site Templates\xml or 2\TEMPLATE\GLOBAL\XML folder. This is the manifest file for the site definition. It is a required file and is used to specify available configurations for a site.
- Default.aspx - located under SiteTemplates folder. This file defines the structure of the home page of site created using the site definition.
- Default.master - located under 12\Template\Global. It is used by all site definitions.
- Schema.xml - located under 12\TEMPLATE\GLOBAL\Lists. It is used to define the schema (fields) for lists and libraries.
- STDVIEW.xml - located under 12\TEMPLATE\GLOBAL\XML. It defines view information for a site.
- VWSTYLES.xml - located under 2\TEMPLATE\GLOBAL\XML. It defines view information for lists/libraries.
Now that we've had an overview of various files that constitute a site definition, let's create one basic Site Definition.
- Go to 12\Template\Site Templates\ folder. Copy the folder named - STS and paste in a different work folder for custom-projects on your system.
- Go to 12\TEMPLATE\1033\XML. Copy WEBTEMP.XML and paste it to the projects work folder created in step1.
- Open Visual Studio 2005/2008. Create a new C# class library project named - SoftwareSiteDefinition. We'll create the following structure.
- Create above folder structure without creating files. Once done, let's start adding files to them. Go to the folder copied in step 1. open the XML folder within it. Cut-paste ONET.XML file from it to Template\SiteTemplates\SoftwareSiteDefinition\xml\. Cut-paste default.aspx from copied folder in step 1 and paste under Template\SiteTemplates\SoftwareSiteDefinition\.
- Now go to the work folder created in step 1. Rename the WEBTEMP.XML file to Webtemp_SoftwareSiteDefinition.xml. Cut-paste this file to Template\1033\XML\ folder in above solution (step 3).
- Add a new xml file named - manifest.xml and a text file named- cab.ddf to DeploymentFiles folder. Once we've the files ready, let's start working on them.
- Open the Webtemp_SoftwareSiteDefinition.xml file.
- paste the below text: -
<?xml version="1.0" encoding="utf-8"?>
<!-- _lcid="1033" _version="12.0.4518" _dal="1" -->
<!-- _LocalBinding -->
<Templates xmlns:ows="Microsoft SharePoint">
<Template Name="SoftwareSiteDefinition" ID="11000">
<Configuration ID="0"
Title="Software Development Project Site" Hidden="FALSE" ImageUrl="/_layouts/images/stsprev.png"
Description="A site for managing Software Development projects."
DisplayCategory="My Custom Templates" >
</Configuration>
</Template>
</Templates> - The name of the template is SoftwareSiteDefinition which should be unique in the 12\template\SiteTemplates folder. This would be the name of the Site definition folder created in above project. They should be identical and this is how the template file associates itself with its site definition.
- The configuration element specifies the available configurations/variations within a site definition. There can be multiple configuration elements within Template element. Title attribute specifies the name of configuration as it appears on create new site page. DisplayCategory specifies the tab under which the configuration would be available. Specify a new unique name to create a new tab. Template ID specifies the unique id of site definition. Use values > 10000.
- Now open the file - onet.xml from the solution project. We'll make some changes to this definition.
- NavBars element is used to specify initial navigation as it appears on the site. One can specify the quick launch navigation as well as top navigation. Paste the below code for navigation.
<NavBars>
<NavBar Name="$Resources:core,category_Top;" Separator="&nbsp;&nbsp;&nbsp;" Body="<a ID='onettopnavbar#LABEL_ID#' href='#URL#' accesskey='J'>#LABEL#</a>" ID="1002"/>
<NavBar Name="$Resources:core,category_Documents;" Prefix="<table border=0 cellpadding=4 cellspacing=0>" Body="<tr><td><table border=0 cellpadding=0 cellspacing=0><tr><td><img src='/_layouts/images/blank.gif' ID='100' alt='' border=0>&nbsp;</td><td valign=top><a ID=onetleftnavbar#LABEL_ID# href='#URL#'>#LABEL#</td></tr></table></td></tr>" Suffix="</table>" ID="1004"/>
<NavBar Name="$Resources:core,category_Lists;" Prefix="<table border=0 cellpadding=4 cellspacing=0>" Body="<tr><td><table border=0 cellpadding=0 cellspacing=0><tr><td><img src='/_layouts/images/blank.gif' ID='100' alt='' border=0>&nbsp;</td><td valign=top><a ID=onetleftnavbar#LABEL_ID# href='#URL#'>#LABEL#</td></tr></table></td></tr>" Suffix="</table>" ID="1003"/>
<!--<NavBar Name="$Resources:core,category_Discussions;" Prefix="<table border=0 cellpadding=4 cellspacing=0>" Body="<tr><td><table border=0 cellpadding=0 cellspacing=0><tr><td><img src='/_layouts/images/blank.gif' ID='100' alt='' border=0>&nbsp;</td><td valign=top><a ID=onetleftnavbar#LABEL_ID# href='#URL#'>#LABEL#</td></tr></table></td></tr>" Suffix="</table>" ID="1006"/>-->
<NavBar Name="$Resources:core,category_Sites;" Prefix="<table border=0 cellpadding=4 cellspacing=0>" Body="<tr><td><table border=0 cellpadding=0 cellspacing=0><tr><td><img src='/_layouts/images/blank.gif' ID='100' alt='' border=0>&nbsp;</td><td valign=top><a ID=onetleftnavbar#LABEL_ID# href='#URL#'>#LABEL#</td></tr></table></td></tr>" Suffix="</table>" ID="1026"/>
<NavBar Name="$Resources:core,category_People;" Prefix="<table border=0 cellpadding=4 cellspacing=0>" Body="<tr><td><table border=0 cellpadding=0 cellspacing=0><tr><td><img src='/_layouts/images/blank.gif' ID='100' alt='' border=0>&nbsp;</td><td valign=top><a ID=onetleftnavbar#LABEL_ID# href='#URL#'>#LABEL#</td></tr></table></td></tr>" Suffix="</table>" ID="1027"/>
<NavBar Name="Quick Links" Prefix="<table border=0 cellpadding=4 cellspacing=0>" Body="<tr><td><table border=0 cellpadding=0 cellspacing=0><tr><td><img src='/_layouts/images/blank.gif' ID='100' alt='' border=0>&nbsp;</td><td valign=top><a ID=onetleftnavbar#LABEL_ID# href='#URL#'>#LABEL#</td></tr></table></td></tr>" Suffix="</table>" ID="1028">
<NavBarLink Name="Google Chart" Url="http://code.google.com/apis/chart/" />
<NavBarLink Name="Heather Solomon" Url="http://www.heathersolomon.com/blog/articles/MOSS07DesignComponents.aspx"/>
</NavBar> - As we can see, I have commented the discussions link from quick launch, since I don't want this list to appear. I also don't want this list to be create by default ( this'll be taken care of in later sections). I have also added a new navigation heading named - Quick Links which has two hyperlinks.
- Now go to the configuration section, remove all configurations but the one with ID=0.
<Lists>
<List FeatureId="00BFEA71-E717-4E80-AA17-D0C71B360101" Type="101" Title="$Resources:core,shareddocuments_Title;" Url="$Resources:core,shareddocuments_Folder;" QuickLaunchUrl="$Resources:core,shareddocuments_Folder;/Forms/AllItems.aspx"/>
<!--<List FeatureId="00BFEA71-6A49-43FA-B535-D15C05500108" Type="108" Title="$Resources:core,discussions_Title;" Url="$Resources:core,lists_Folder;/$Resources:core,discussions_Folder;" QuickLaunchUrl="$Resources:core,lists_Folder;/$Resources:core,discussions_Folder;/AllItems.aspx" EmailAlias="$Resources:core,discussions_EmailAlias;"/>-->
<!--
<List FeatureId="00BFEA71-D1CE-42de-9C63-A44004CE0104" Type="104" Title="$Resources:core,announceList;" Url="$Resources:core,lists_Folder;/$Resources:core,announce_Folder;">
<Data>
<Rows>
<Row>
<Field Name="Title">$Resources:onetid11;</Field>
<Field Name="Body">$Resources:onetid12;</Field>
<Field Name="Expires"><ows:TodayISO/></Field>
</Row>
</Rows>
</Data>
</List>
-->
<List FeatureId="00BFEA71-2062-426C-90BF-714C59600103" Type="103" Title="$Resources:core,linksList;" Url="$Resources:core,lists_Folder;/$Resources:core,links_Folder;"/>
<List FeatureId="00BFEA71-EC85-4903-972D-EBE475780106" Type="106" Title="$Resources:core,calendarList;" Url="$Resources:core,lists_Folder;/$Resources:core,calendar_Folder;" QuickLaunchUrl="$Resources:core,lists_Folder;/$Resources:core,calendar_Folder;/Calendar.aspx" EmailAlias="$Resources:core,calendar_EmailAlias;"/>
<List FeatureId="00BFEA71-A83E-497E-9BA0-7A5C597D0107" Type="107" Title="$Resources:core,taskList;" Url="$Resources:core,lists_Folder;/$Resources:core,tasks_Folder;" QuickLaunchUrl="$Resources:core,lists_Folder;/$Resources:core,tasks_Folder;/AllItems.aspx"/>
</Lists> - I have commented the discussions and announcement list section, since I don't want it to appear in the pre-created lists. Remember that if a list is not created initially, it's references should also be removed from quick launch navigation.
- Remove all modules child elements of configuration element except the one named - Default. Now go to the Modules element which is a child element of Project and not configuration element. remove all modules except- Default.
<Module Name="Default" Url="" Path="">
<File Url="default.aspx" NavBarHome="True">
<View List="$Resources:core,shareddocuments_Folder;" BaseViewID="0" WebPartZoneID="Top" WebPartOrder="2"/>
<!--<View List="$Resources:core,lists_Folder;/$Resources:core,announce_Folder;" BaseViewID="0" WebPartZoneID="Left"/>-->
<View List="$Resources:core,lists_Folder;/$Resources:core,calendar_Folder;" BaseViewID="0" RecurrenceRowset="TRUE" WebPartZoneID="Left" WebPartOrder="2"/>
<AllUsersWebPart WebPartZoneID="Right" WebPartOrder="1"><![CDATA[
<WebPart xmlns="http://schemas.microsoft.com/WebPart/v2" xmlns:iwp="http://schemas.microsoft.com/WebPart/v2/Image">
<Assembly>Microsoft.SharePoint, Version=12.0.0.0, Culture=neutral, PublicKeyToken=71e9bce111e9429c</Assembly>
<TypeName>Microsoft.SharePoint.WebPartPages.ImageWebPart</TypeName>
<FrameType>None</FrameType>
<Title>$Resources:wp_SiteImage;</Title>
<iwp:ImageLink>/_layouts/images/homepage.gif</iwp:ImageLink>
<iwp:AlternativeText>$Resources:core,sitelogo_wss;</iwp:AlternativeText>
</WebPart>
]]></AllUsersWebPart>
<View List="$Resources:core,lists_Folder;/$Resources:core,links_Folder;" BaseViewID="0" WebPartZoneID="Right" WebPartOrder="2"/>
<NavBarPage Name="$Resources:core,nav_Home;" ID="1002" Position="Start"/>
<NavBarPage Name="$Resources:core,nav_Home;" ID="0" Position="Start"/>
</File>
</Module> - This element will specify the views appearing on the home page and the navigations. Add a new view for - Shared Documents list. Ensure that the list is created in advance (step 15). Comment the announcement list view. Save the file.
- Now open default.aspx from the project.
- Add a new data row for containing a webpart zone which will span all the rows below.
<table width="100%" cellpadding=0 cellspacing=0 style="padding: 5px 10px 10px 10px;">
<tr>
<td valign="top" width="100%" colspan="3">
<WebPartPages:WebPartZone runat="server" FrameType="TitleBarOnly" ID="Top" Title="loc:Top" />
</td>
</tr>
<tr>
<td valign="top" width="70%">
<WebPartPages:WebPartZone runat="server" FrameType="TitleBarOnly" ID="Left" Title="loc:Left" />
</td>
<td> </td>
<td valign="top" width="30%">
<WebPartPages:WebPartZone runat="server" FrameType="TitleBarOnly" ID="Right" Title="loc:Right" />
</td>
<td> </td>
</tr>
</table>
</td>
</tr>
</table> - Save the file.

Once the site definition is created, we need to create a deploy package for it.
Creating the WSP/solution package for Site definition
- open manifest.xml and make following entries.
<?xml version="1.0" encoding="utf-8" ?>
<Solution xmlns="http://schemas.microsoft.com/sharepoint/" SolutionId="0C07DA61-1542-4d49-BA09-2587B4125A63"
DeploymentServerType="WebFrontEnd"
ResetWebServer="False">
<SiteDefinitionManifests>
<!-- name of root folder of manifest of site definition within the WSP-->
<SiteDefinitionManifest Location="SoftwareSiteDefinition">
<!-- complete path of webtemp file within this solution package-->
<WebTempFile Location="1033\XML\Webtemp_SoftwareSiteDefinition.xml"/>
</SiteDefinitionManifest>
</SiteDefinitionManifests>
</Solution> - Rt. click the file, select properties. Select the schema which should be WSS.xsd (xmlns=http://schemas.microsoft.com/sharepoint/) located in 12\template\xml.
- This file specifies the name of associated files. SiteDefinitionManifest Location specifies the name of the root folder of site definition within the WSP package. WebTempFile Location specifies the location and name of the webtemp files within the WSP package. hence the path is relative to WSP and not 12 hive.
- save the file and open cab.ddf. This is a diamond directive file.
- Paste the following.
;****** this file packages the files from solution to WSP
.OPTION Explicit
.Set Cabinet=On
.Set CabinetNameTemplate=SoftwareSiteDefinition.wsp;****name of the wsp file
.Set CompressionType=MSZIP
.Set DiskDirectory1=MYWSP
.Set DiskDirectoryTemplate=CDROM
.Set UniqueFiles=Off;*** include location of WSP manifest from root of the solution
DeploymentFiles\manifest.xml;*** include locations of onet,default.aspx and webtemp
;*** create subfolder within the WSP.Set DestinationDir=SoftwareSiteDefinition
Template\SiteTemplates\SoftwareSiteDefinition\default.aspx.Set DestinationDir=SoftwareSiteDefinition\xml
Template\SiteTemplates\SoftwareSiteDefinition\xml\onet.xml.Set DestinationDir=1033\XML
Template\1033\XML\Webtemp_SoftwareSiteDefinition.xml - We need to place all the necessary files from the solution project to the package so that they could be picked up by manifest.xml.
- The package will have following structure: - Two folders with following hierarchies.
- SoftwareSiteDefinition
- default.aspx
- xml
- onet.xml
- 1033
- XML
- Webtemp_SoftwareSiteDefinition.xml
- XML
- DeploymentFiles\manifest.xml
- DestinationDir allows us to create subfolders within the package. The locations below it specify the actual location of all four files within the project solution. save the file
- Go to command prompt. Browse to the root folder e.g. C:\SharepointCustomProjects\SoftwareSiteDefinition\SoftwareSiteDefinition.
- un makecab /f DeploymentFiles\manifest.xml. This will create a package named - MYWSP under the root of the project which will contain a WSP cabinet file named - SoftwareSiteDefinition.wsp.
Sources:
Microsoft SharePoint Building office 2007 solutions in C# 2005 - Scot Hillier (APRESS).
Professional SharePoint 2007 Web Content Management Development - Andrew Connell (WROX)
Saturday, July 18, 2009
Enumerate SharePoint Features
.
Saturday, July 18, 2009
0
comments
Enumerate Installed Features in the Farm
| TreeView TreeView1 = new TreeView(); TreeView1.Nodes.Add(new TreeNode("Features")); SPSecurity.RunWithElevatedPrivileges(delegate() //get the name of the current web in current user's context string spSiteURL = SPControl.GetContextSite(Context).Url.ToString(); //Initialize the spweb object using the elevated privileges #region Return Installed Features. oFSiteNode = new TreeNode("All Farm Installed Features"); SPFarm oFarm = oSite.WebApplication.Farm; SPFeatureDefinitionCollection oFeatDefColl = oFarm.FeatureDefinitions; TreeView1.Nodes[1].ChildNodes.Add(oFSiteNode); #endregion TreeView1.CollapseAll(); } } |
Enumerate Site collection and Site Content Types
Labels: content types, object model, sharepoint development, webpartI will be creating a web part that enumerates root site and all it's subsites content types along with their columns.
We will be using a Tree View control for this.
| using System; using System.Web.UI; using Microsoft.SharePoint; /// <summary> foreach (SPContentType conttype in oCTypeColl) //add columns //now oSubNode is the parent node } /// <summary> //fetch fields of content type if (oFldColl.Count != 0) foreach (SPField oField in oFldColl) } /// <summary> //get the name of the current web in current user's context string spSiteURL = SPControl.GetContextSite(Context).Url.ToString(); //Initialize the spweb object using the elevated privileges #region Add content types TreeNode oSiteNode = null; //get contenttypes collection for each subsite including root site //if site doesn't have any Ctypes (only content types defined for that particular site are displayed) //send current site and root contenttype node (not the actual content type) //add root contenttype node to website node }
TreeView1.CollapseAll(); } protected override void OnPreRender(EventArgs e) protected override void CreateChildControls() { protected override void RenderContents(HtmlTextWriter writer) } |
Tuesday, June 23, 2009
SharePoint ULS logs are empty: 0 KB logs in 12 Hive logs
.
Tuesday, June 23, 2009
1 comments
A few months back I decided that it was time to get rid of unnecessary SharePoint logs since I wasn't into development and event logs were coming sufficient. Just in case you guys are wondering how to enable diagnostic logs, here are the steps: -
1) Open central administration > operations. Click on 'diagnostic logging' under 'Logging and Reporting'.
2) Select 'no' for 'Customer Experience Improvement Program' and 'ignore errors' for 'error reports'. If you wish to throttle (restrict) the events captured, select from category and events to be captured in event logs and trace logs (12 hive).
3) Provide the location for storing these logs. I usually keep 5-10 log files of 10-30 minutes each; otherwise my disk becomes full. As a practice keep logs in a different disk then the MOSS/WSS installation so that disk full issues do not affect the service.
NOTE: there are two types of logs in 12 Hive logs folder (<local-drive>\Program Files\Common Files\Microsoft Shared\web server extensions\12\Logs). The ones sitting outside the GUID folders are used for debugging and called ULS (unified logging service) logs. The ones within the GUID are usage analysis logs.
======================================================================
Anyway, back to my original issue; I happily disabled the logs, however few weeks back decided to re-enable them. And what, did everything as described above and the log files hence created were empty. Hmm, mind boggling; didn't look like a permission issue; still haven' figured out yet; the logs were being constructed but were of 0 KB each; files were empty: -
Things to check in his situtaion: -
- enough disk space.
- check if WSS timer service and WSS tracing service are running. Restart them once again.
- try throttling the events (though this is most unlikely to work out as a solution since you would be restricting logs; exactly the opposite); however it worked for me; I enabled Verbose logging in trace log category of diagnostic logging page and logs started filling up. Whew!! Thank goodness, at least I have some data in logs now. This is a very strange behavior, what you guys should check is if you are throttling anything; remove that selection. For example throttling error events when no errors are there would give empty logs.
If anyone has figured out the solution, do let me know as my system is behaving exactly the opposite. :)
Monday, June 15, 2009
Error: The IIS Admin service terminated with the following error. The system cannot find the file specified
.
Monday, June 15, 2009
1 comments
Today when I started my server (WIN 2k3), it threw a 'Service control manager' error: 'Failed to start at least one or more services'. I checked Event viewer and found the following error.

Upon manually trying to start IIS Admin from MMC , same error was thrown. I googled and as expected found an article - http://support.microsoft.com/kb/332103 from Microsoft saying "reinstall IIS". Err.. Definitely not. There has to be some other way. Soon I stumbled upon this angelic post - http://www.iisworkstation.com/2008/07/troubleshooting-could-not-start-iis.html. You can refer to the same post or in case are unable to open it, find below the instructions to troubleshoot this issue.
1) IIS ADMIN service needs two files - 'metabase.xml' and MBschema.xml to start; they reside in C:\WINDOWS\system32\inetsrv. The first thing to check is if files are available, in my case 'metabase.xml' was missing. I vaguely remembered that chkdsk that ran last night had mentioned some corrupt metabase.xml. Hmm.. so the poor file was removed... The first thing I did was to stop automatic startup of IIS ADMIN service from services.msc.
2) Fortunately, C:\WINDOWS\system32\inetsrv\History maintains the 10 latest backups (by default) of metabase.xml and MBScheme.xml files. As instructed, I copied the most recent entry (by modified date).
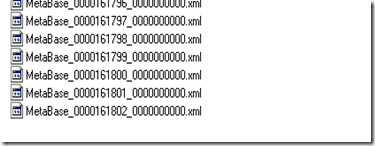
and pasted it to C:\WINDOWS\system32\inetsrv. Then I renamed it to 'metadata.xml'. Next I went to services.msc, changed the startup mode of IIS ADMIN from manual to automatic and started it. Immediately I got some script error. hmm. ...anyways, I clicked on yes and continued;the service started successfully.
3) Next thing to do was to increase the number of history files saved (learn from the past as I periodically backup SAM, SECURITY, SOFTWARE AND DEFAULT) . As instructed I ran the following command from start > run.
cscript.exe adsutil.vbs set /MaxHistoryFiles "15"
Ntime when the system restarts the effects will take place (else manually restart the IIS ADMIN service again).
4) Next thing was to go to 'INETMGR'. All the websites were in stopped state. I manually started them and checked in IE if my SharePoint sites were coming up fine. Finally YES YES YES.
Hope it helps anyone who faces this issue. Thanks to the original post!!
Thursday, June 11, 2009
How to exclude a site from being searched within a particular site scope.
.
Thursday, June 11, 2009
0
comments
If you want to prevent a site from being crawled at all, you can set the 'Search Visibility' to false within the site settings. For an entire site collection you need to set this for each site as 'search visibility' is a site feature. (site features > search visibility).
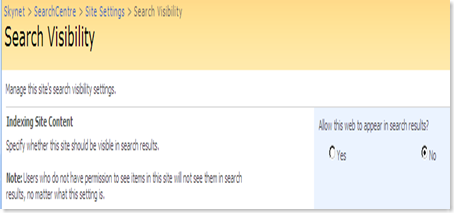
The preferred way is to create a crawl rule in Central Admin of MOSS.

But what if you do want your site to be crawled however don't want it to appear in search results within certain site scopes? Let us assume 'ALL SITES'.
well, quite simple!
go to Central admin > Shared services > search services > view scopes.
Open the 'all sites' scope in edit mode. create a new exclude rule for hostname. save changes and bingo. :)
Wednesday, June 10, 2009
Downgrade Windows Vista to Windows XP on Inspiron 1525
.
Wednesday, June 10, 2009
3
comments
[Out of context from current blog's subject, but thought should share with you; so.....Last night, my brother's system completely crashed and resolved to never work again for 2 minutes at a stretch. Unfortunately poor thing was hit by a deadly virus (unknown of course) a month back (courtesy his best friend who suddenly decided to download a video file packaged with a treat).
We tried everything from setting the Dell Inspiron 1525 to factory settings, blah blah but nothing worked. So ultimately, it was decided that Vista's time is up! Yes!!!! I never wanted to reinstall Vista. hehehe (finally will try slip-streaming). yay!
We collectively agreed on making a fresh install of Windows XP (goo goo goo...); I located one of my old CDs and prayed it would work and yes it did :)
But what is this; as soon as the setup started I got hi by below error: -

"Setup did not find any hard disk drives installed in your computer". I am sure it is one of those old sticky errors that people encounter while downgrading to Windows XP or Windows 2003 Server.
Reason: The system has SATA hard drive whose drivers are missing in Windows XP installation. So what now? I googled and found the way out and this is what I am about to share with you guys today.
We need to somehow integrate the missing SATA drivers with Windows setup files and use it.
Task 1: Find SATA drivers for Dell Inspiron 1525
Luckily unlike my HP laptop, I didn't have a field day locating SATA drivers for above model. Go to http://support.dell.com/support/downloads/driverslist.aspx?c=us&l=en&s=gen&ServiceTag=&SystemID=INS_PNT_PM_1525&os=WLH&osl=en&catid=&impid. Select "Windows XP" from OS dropdown.

and Bingo, all the drivers are located at one good old page. :). As for initial Windows XP installation, all we need is SATA drivers. I downloaded the highlighted one. at times

Download this EXE file (http://ftp.us.dell.com/SATA/R182441.exe). Once downloaded, right-click on it and select 'extract files' (need WIN RAR). Provide a location like "C:\XP Drivers for Inspiron 1525\R166200". At times 'download' button doesn't work. In such a case, replace highlighted text with the value of 'fileID' mentioned in the address bar.
Task 2: Install NLITE for creating a new windows XP setup slip streamed with SATA drivers
If you're using non Vista OS like XP, 2k3 to perform slip-streaming go to http://nliteos.pcrpg.org/nlite/nLite-1.4.9.1.installer.exe; for VISTA users http://nliteos.pcrpg.org/vlite/vLite-1.2.installer.exe.
Remember you would need .NET framework 2.0 SP1 as a prerequisite in case on XP, WIN 2K3 and VISTA and an additional AIK Kit (heavy files) for VISTA. I used my server for creating set-up. :). Download and Install NLite/VLite.
Task 3: Slip-Streaming (integrating SATA drivers with Win XP Pro Setup)
Start NLITE. click Next until you reach below screen, Click on Browse button and select the root folder containing WIN XP setup (in CD/ or HDD if again creating a new image with old setup files). once done, you'll again get a screen, where you need to provide the location to extract win XP setup files to. call it - c:\WinXPISO.

Click Next. The setup files will start loading, when the progress bar finishes, you will get below screen.
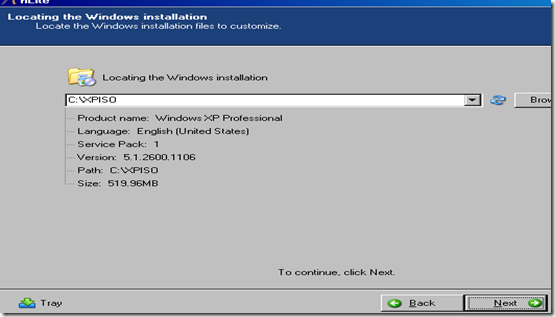
Click Next until you reach below screen. Use 'ctrl' key to multiple select different options. I selected 'service pack', 'drivers' and 'bootable ISO'. Make sure you select at least 'drivers' and 'bootable ISO'. clik Next.

If you selected 'service pack' you'' get below screen. Click on 'Browse' button and locate the EXE for Service Pack (2 or 3) in this case. You can get WIN XP SP2 from here-http://www.microsoft.com/downloads/details.aspx?familyid=049c9dbe-3b8e-4f30-8245-9e368d3cdb5a&displaylang=en and SP 3 from here - http://www.microsoft.com/downloads/details.aspx?FamilyID=5b33b5a8-5e76-401f-be08-1e1555d4f3d4&DisplayLang=en

If you haven't selected service pack option, you'll be presented with below screen. Click Insert. Select 'single driver'.

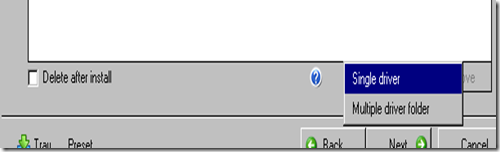
Locate the drivers folder (where you extracted SATA driver files in Task 1).
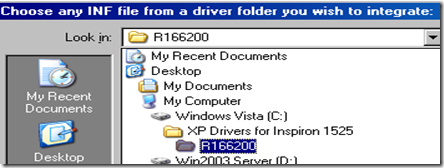
select One of the INF files and click Open, both will be selected anyhow.

select 'textmode driver' option. I selected the following highlighted drivers for my set up. Click on OK.

Click Next. Click Yes upon 'start process?' prompt. Once the process finishes, you've an option to either Burn the new setup files or create an ISO. I chose to create an ISO. select 'create image' and click on 'make ISO' button to start making ISO


Once the ISO is created you can burn the image to a DVD. I used Roxio Easy CD creator. Now that the CD is ready, insert it in the VISTA laptop. I used hairpin to pull the CD tray out and place the CD in it.
On Inspiron 1525, Use F12 to get boot option and select CD/DVD option and proceed. I took the fancy of formatiing and repartitioning the entire HDD since Inspiron 1525 didn't allow more than 1 partition besides System and recovery partition.
Task 4: Get the Missing Drivers for Inspiron 1525
a) Notebook System Software (only for DELL)
http://ftp.us.dell.com/utility/R181862.exe
b) System Software (only for DELL)
http://ftp.us.dell.com/utility/Dell_System-Software_A03_R214472.exe
c) Mobile Chipset Drivers
http://ftp.us.dell.com/chipset/R166187.exe
d) Ricoh Flash Controller Driver
http://ftp.us.dell.com/chipset/R166188.EXE
e) Video Adapter Driver
In order to correctly identify your chipset download chipset ID utility from http://downloadcenter.intel.com/Detail_Desc.aspx?agr=Y&ProductID=861&DwnldID=13799. Mine is Intel GM965 Express Chipset Family.
I recommend searching for latest video drivers/ SATA HDD drivers on Intel rather than Dell -http://downloadcenter.intel.com/default.aspx.
For above mentioned chipset select http://downloadcenter.intel.com/Detail_Desc.aspx?agr=Y&ProductID=2800&DwnldID=17353&strOSs=44&OSFullName=Windows*%20XP%20Professional〈=eng
f) Network Interface Card (Ethernet Controller)
Marvell 88E80XX 10/100 Ethernet Controller at http://ftp.us.dell.com/network/R180046.exe.
g) Dell Quickset (only for DELL)
http://ftp.us.dell.com/app/R174191.exe.
h) Audio Adapter
Sigmatel STAC 92XX C- Major HD Audio Driver at http://ftp.us.dell.com/audio/R180044.exe
i) Modem Driver
Conexant D330,HDA,MDC,v.92,modem at http://ftp.us.dell.com/comm/R167368.exe
j) Wireless Network Card
WLAN driver for Dell Wireless 1395 WLAN MiniCard at
k) Touchpad driver
http://ftp.us.dell.com/input/R180045.exe
l) Laptop Integrated webcam
This was the trickiest of all. At first I got the error " device driver does not support current OS version". After I installed WIN XP SP 2 I was able to run setup but it always ended in failure. After repeated attempts and trying to make the cam locate drivers using device driver manager somehow 'hardware was properly detected and installed ( magically :))
http://ftp.us.dell.com/input/R165116.EXE
m) Bluetooth
http://ftp.us.dell.com/network/R140135.exe
===============================
Umm...this should pretty much do! Stay tuned for the next blog and your comments are most welcome!
Wednesday, June 3, 2009
When publishing is enabled the ‘HOME’ tab is replaced with the parent site’s name
.
Wednesday, June 3, 2009
1 comments
changing the content page’s name that appears on IE window.
· On the default.aspx page, search for
<SharePoint:EncodedLiteral runat="server" text="<%$Resources:wss,multipages_homelink_text%>" EncodeMethod="HtmlEncode"/> -
<SharePoint:ProjectProperty Property="Title" runat="server"/>
· Replace <SharePoint:ProjectProperty Property="Title" runat="server"/> with the new title.
Changing the site’s home tab name: -
a) Rename the tab through SharePoint GUI as ‘HOME’
b) Open the master page, search for
<SharePoint:SPLinkButton runat="server" NavigateUrl="~site/" id="onetidProjectPropertyTitle">
<SharePoint:ProjectProperty Property="Title" runat="server" />
</SharePoint:SPLinkButton>
c) Replace <SharePoint:ProjectProperty Property="Title" runat="server" /> with site’s actual name.
SharePoint content page throw error or take forever to open
Labels: error, sharepoint designer, webpartThis might happen due to a faulty webpart like Content editor web part containing invalid content URL link.
SOLUTION: remove content URL from content editor webpart using SharePoint designer.
Error while closing/deleting webparts through SharePoint GUI
Labels: error, sharepoint designer, webpart
Activating the publishing feature throws error 'document library/list/survey already exists'
Labels: Publishing, sharepoint designer
SharePoint Blog site - category filter does not work after editing
Labels: blog site, sharepoint designer, sharepoint filterEditing the Category.aspx page filter in a blog site breaks the category filter.
You change the default view of a category that filters the blog posts on a Microsoft Windows SharePoint Services 3.0 blog site. When you visit the SharePoint Services 3.0 blog site, and then you click the link for the category that you changed, the blog posts are not filtered correctly. Instead, all the blog posts are displayed.
SOLUTION:
a) Create a new blog site that uses the same language and categories as the broken one. We'll call this new blog site the "temp" site.
b) Use SharePoint Designer (SPD) to open both the broken and the temp site. You will have each site open in its own instance of SPD.
c) On both instances of SPD, expand the folder tree to Lists | Categories, and open Category.aspx in split mode.
d) On both instances of SPD, select the "Posts" Web part in the design view part of the spilt.
e) For the broken Category.aspx page, locate the <ListViewXML tag on the code section for the Posts Web part. Copy only the GUID from the "View Name= <GUID>" section.
f) Paste this GUID over the same place on the temp Category.aspx page. Here, you are swapping GUIDs, "broken" to "temp."
g) On the temp Category.aspx page, copy the entire code between the <ListViewXML... and </ListViewXML> tags.
h) Paste this chunk of code over top of the same <ListViewXML section of broken Category.aspx page. Here, you are swapping the entire ListViewXML section, "temp" to " broken."
i) Save the changes to the broken page.
j) Examine your broken blog site. It should be fixed now.
k) You can now delete the temp blog site. As a summary of these steps, you are copying the entire ListViewXML section for the Posts Web part on the temp site and overwriting the same section on the broken site. However, you have to keep the View Name GUID from the broken site so that you copy that to the temp site first.
This has now been officially recognized a bug by MS.
‘g_InstanceID’ is undefined' error in meeting workspace site
Labels: customize, error, javascript, master page, meeting workspace, sharepoint designerIn a meeting workspace site, clicking on the dates mentioned in the left panel gives a JavaScript error: -
Error: ‘g_InstanceID’ is undefined.
LEVEL: Advanced
The g_InstanceID global JavaScript variable is declared in a script registered runtime by the Microsoft.SharePoint.Meetings.PropertyBag web control. This control is used in the master page that’s used by Meeting Workspace sites called “MWSDefault.master” (located on server in 12 hive\TEMPLATE\GLOBAL\).
After changing the master page on a Meeting Workspace site, the recurring meeting workspace hyperlinks under “Select a date from the list below” do not work and throw a JavaScript error.
If you create a custom master page and use it for your Meeting Workspaces, a JavaScript error is thrown.
Steps to Reproduce:
Create a new Workspace: Site Actions-> Create Site -> Select [Meetings] Basic Meeting Workspace, click Create.
On Workspace site, add a Calendar list: Site Actions -> Create -> [Tracking] Calendar.
Add a new event to Calendar list, make recurring event, and select [x] Use a Meeting Workspace to organize attendees, agendas, documents, minutes, and other details for this event. Click OK.
Follow steps to create workspace for Calendar event. Go to workspace.
Change master page for workspace: Site Actions -> Site Settings -> [Look and Feel] Master page -> select any master page for Site Master Page and System Master Page. Click OK. Go back to workspace.
SOLUTION:
a) Open SharePoint Designer 2007.
b) Go to File | Open Site and connect to SharePoint site.
c) Expand out _catalogs -> masterpage -> open master page used on Meeting Workspace.
d) In Code View, add the following line of code under
<%@ Import Namespace="Microsoft.SharePoint" %> tag:
<%@ Register Tagprefix="Meetings" Namespace="Microsoft.SharePoint.Meetings" Assembly="Microsoft.SharePoint, Version=12.0.0.0, Culture=neutral, PublicKeyToken=71e9bce111e9429c" %>
Add the following line of code after opening <body …> tag:
<Meetings:PropertyBag runat="server"/>
e) Save master page, check in (if necessary), and publish major version.
Now the links under “Select a date from the list below:” do not work and throw a JavaScript error message: ‘g_InstanceID’ is undefined .
'modification to stylesheets/master page' result in page error in SharePoint GUI.
Labels: error, master page, sharepoint designer, stylesheetin case you're unable to determine what to correct, the best approach is to take a backup of the site and reset it to site-definition using SharePoint Designer.
'Server could not complete your request' ; 'soap: Serverserver was unable to process request' while opening a page in SharePoint designer
Labels: check out, error, master page, sharepoint, sharepoint designer
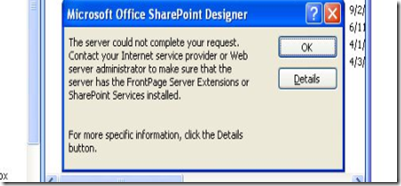

The error that you encounter often shows up when we try to open the file in Read-only mode without checking it out. Such errors are usually associated with incorrect master-page associations. In order to sort this out either correct the errors in the associated master-page or check-out the file and then try to open it.
Remember this could be one of the reasons of such errors and provided above is only a workaround.
'Invalid Master page' error while opening pages in SharePoint designer
Labels: error, master page, sharepoint, sharepoint designerAdding a new master page that doesn’t reference all the content regions and hence throws invalid master page error
SOLUTION: This can only be corrected by attaching a new master page or setting the missing content regions appropriately.
'Edit Page' feature missing from Site settings menu.
Labels: feature, missing, sharepoint, sharepoint designerOne edits the content pages and removes the web part zones containing web parts while keeping the web parts. This removes the option to edit the page/ removes option to edit the web parts.
SOLUTION: Add new web part zones engulfing the existing web parts.
Top Links added on a SharePoint site are not showing up for any user.
Labels: navigation, Publishing, sharepoint, sharepoint designerScenario:
Client has a SharePoint publishing site in which he tries to add top links for global navigation. In spite of adding them, they do not show up on the site.
Ticket Analysis:
Since this was a publishing site, it had a 'Pages' Library. This library ideally contains pages created using publishing layouts. Client had used this library to store aspx/asp/html pages created using SharePoint designer. As per the navigation settings, ‘Show Pages’ section was checked which showed pages from the ‘Pages’ library. One of these custom pages were throwing errors while rendering their links on the navigation and hence the rest of the working top links refused to show up.
Solution:
I advised client to
1) Move these pages to some other library.
2) Use Pages library to only store publishing pages.
3) Until then, uncheck the 'Show Pages' option.
4) once done, top links started showing up.
New Pages added to meeting workspace do not appear as tabs to anyone but the author
Labels: meeting workspace, sharepoint, sharepoint designer, visiblityIssue: -
One adds a new page in a meeting workspace which appears as a tab. However it is visible just to the author of the page and not even to the farm admin.
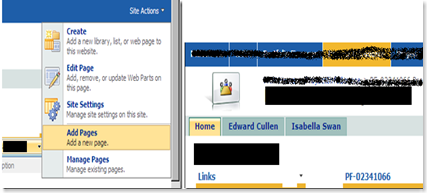
This looks like a bug because not every workspace is affected. However it has not been confirmed by MS so far.
Cause: -
Every meeting workspace has a hidden library internally named (Pages) and externally as - Workspace Pages. All the pages created in a workspace are stored here. It is not accessible through 'View all site content' Page. This library has a field named - Title which is normally an optional field in working meeting workspaces. Apparently in above sighted cases, this field is 'Required' (unlikely event). When a page is checked in after being created all the required fields need to be populated. In normal cases we don't have any such field and hence (no issues during check-in) everyone can see the page once it is created.
However, In above cases/issue, we have a 'required' field named - Title which doesn't get populated automatically and hence the page remains in checked out state to the author.
The library named - Pages doesn't provide any view through which these columns could be populated. Hence we can say that By design they are not supposed to be populated by us. This is the primary reason that the author of these pages cannot check them in even by using SharePoint designer. One will get an error.
Resolution:
1) Un-hide this library in SPD. Right click on Pages library, select properties. Click on settings tab; uncheck 'hide from browsers'.

2) Now this library will be visible on GUI. Open it using 'view all site content' page. click on 'Title' column. select 'No'. click OK.

3) Every pages created afterwards would be visible to all users.
WHAT ABOUT THE PAGES CREATED PREIVIOUSLY??
The original page author needs to open the 'Pages' Library in SPD; make a copy of the checked out pages (created previously and invisible to all but author); paste the copy in the pages library; delete the original pages; rename the new copies with original names.
WHY CAN'T I COPY-PASTE THEM THROUGH GUI??
This would require us to browse to the Pages library view in GUI. However By design this library doesn't have any view. Though one gets an option to create view; however upon clicking OK, you will get an error. :)
Subscribe to:
Posts (Atom)


